Table of contents
With great features like session and on-demand modes, full convection heat, and a wide temperature spectrum, the Tinymight 2 dry herb vaporizer is a killer vape with a slight learning curve. We’ll show you how to go from newbie to seasoned pro with this quickstart guide, so grab your Tinymight 2 and follow along for a great first session.
Quick rundown
- Charge it
- Turn it on and run a burnoff
- Grind your herbs and pack the stem
- Set the temperature and turn it on to session mode
- Hit it when it vibrates
- Try it on-demand mode
- Stir it with the built-in stir tool
- Finish up and clean it

What’s in the Box
- Tinymight 2 Vaporizer
- 18650 battery
- 55mm Glass Tube
- Cooling Unit
- 80mm Titanium Tube
- Spare O-Rings & Screens
- USB-C Charging Cable
- Carrying Pouch
- Instruction Manual
Fully charge the Tinymight 2
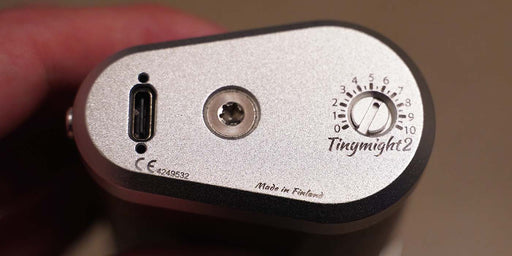
Let’s fully charge your Tinymight 2 before we roll into our first session. Take the included charge cable, plug in your vape, and let it sit until it’s full. The lights on the bottom of Tinymight 2 will change colors to indicate its current charge:
- Green: Fully Charged
- Blue: 75%
- Purple: 50%
- Red: 25% and under
Note: The included charge cable is USB-C to USB-C so make sure you have a compatible charging block.
One button and one temperature dial
Turn the Tinymight 2 on/off, heat it up, and switch between its session and on-demand modes with its single button, located on the end of the unit. Turn it upside down and use the small dial, numbered from 1 to 10, to set your temperature.
Cleanse it with a burn-off
Once it’s fully charged, we’ll run it through a quick burn-off in session mode to prime it and cleanse it of any manufacturing residues. To turn it on into session mode, triple click and hold until it vibrates, and then it’s ready.
Set the temperature dial to 8, insert the stem screen side down, and click the vape once to fire it up. Let it run until it shuts off and then we’re good to go.
Grind your herbs and pack the stem
The Tinymight’s convection heat does well with a medium to coarse ground finish. Take any grinder you have and shred it till it’s chopped up. Then, take the glass stem and pack the end with the mesh screen up to the top with your ground herbs. Give it a light tamp, but don’t pack it down too tight. Then, hold the vape upside down and insert the herb-end of the stem all the way into the oven.
Set the temperature dial and fire it up in session mode
We’ll run this first batch on #4 through session mode for a light, but effective experience to get a feel for the Tinymight. If your vape is off, triple-click and hold until it vibrates to turn it on and set it into session mode. Click it once and when it vibrates, it’s ready to hit!
Nice, comfortable draw
Once it vibrates, give it a nice comfortable draw of about five seconds. You’ll feel the warmth hit your lips and the vapor tickle your lungs. Convection vapes ramp up the vapor throughout the session so jump right back in with a slower, longer hit if the first one wasn’t up to par.
Hit it in on-demand mode
On-demand mode is great if you want to take a few quick hits and save the rest for later. It only heats up when you press the button and turns off as soon as you let go. Just give it a quick triple-click to set it into on-demand mode. Don't hold in the last click.
When you’re ready, click and hold, and hit it when it vibrates. Your herbs only heat up when you click and hold it, so take slow relaxed draws to get the thickest hits. Release the button when you’re done and that’s it!
Give it a stir
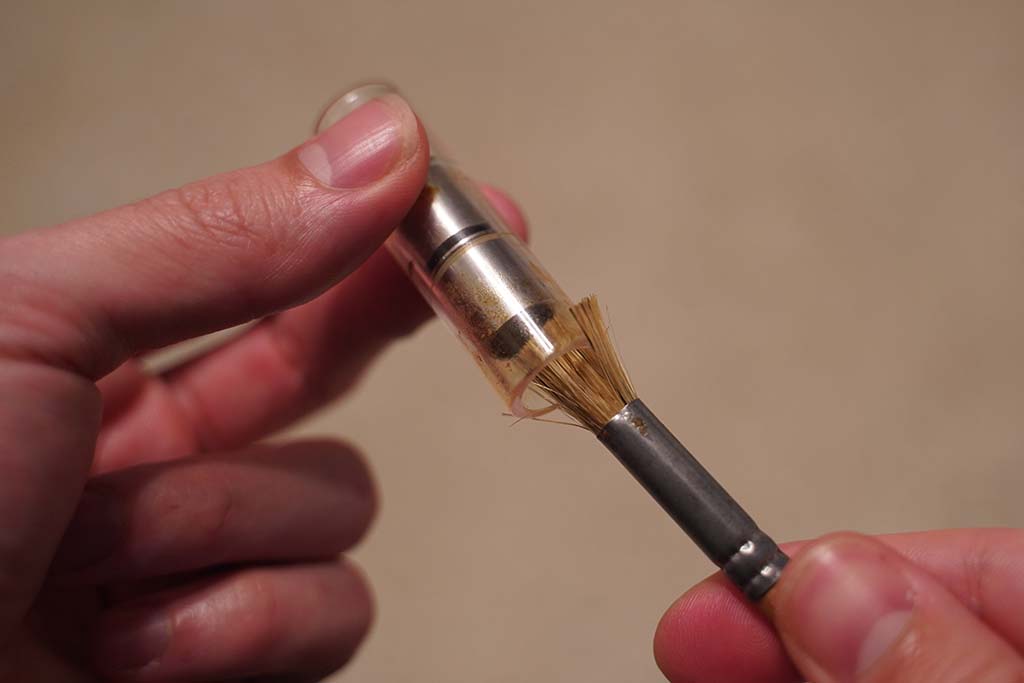
Convection vapes, like the Tinymight 2, need a quick stir around halfway through the session to extract every last bit. The makers of the Tinymight know this so they included a built-in stir tool, next to the stem, for this exact reason.
When the vapor starts to thin, hold the vape upside down, remove the stem, and give the herbs a light swirl with the stir tool. Tamp it down, throw it back in the oven and finish it up with a few more hits.
Clear out the stem when you’re done
When you’re all finished with the session, take the stir tool and clear the herbs out of the stem and anything that fell into the oven. If you have one, use a small cleaning brush and remove any herbs stuck to the sides. Make sure you do this after each session to keep your vape in the best condition for longer.

TinyMight 2 Vaporizer
$349.00
Inhale desktop-quality sessions with the powerful Tinymight 2
- Full convection flavor and dense clouds
- Session & On-demand modes
- Replaceable battery
- Adjustable oven
- A real heavy hitter